
We'll set up and deploy a full application with a frontend, a backend, a database, horizontal scaling, HTTP/3, a captcha, and a free subdomain in under an hour.
You can see the final result here (only via VPN).
What is a worker?
Cloudflare Workers is a platform for cloud-native development that runs your code on Cloudflare's infrastructure, sparing developers from having to build the entire architecture from scratch. It scales automatically, keeps latency low, comes with a ready-made CI/CD pipeline, and integrates with other Cloudflare services in two clicks.
I've prepared a template for this walkthrough with the following stack:
- React + Vite + SWC + MUI on the frontend
- Drizzle ORM + itty-router on the backend
- Zod + Chafana for (de)serializing data and generating an API schema for Swagger
More details about the template are here. As an example, it contains a couple of MUI frontend pages, a post model and an API for it.
So, let's get started.
1. Requirements
The application needs:
- NodeJS (LTS)
- A Cloudflare account
- VPN/GoodbyeDPI (if you are in Russia)
2. Clone the template
The first step is to create a new project on Cloudflare Workers. Use this command:
npm create cloudflare@latest -- habr-app # habr-app — this is your project's name
An interactive menu with ready-made worker templates opens in the terminal. There's no fullstack application template there, so we'll take our own. In the menu, select in order:
- Template from a GitHub repo
- Paste https://github.com/StalkerRaftik/cf-web-monorepo
- Wait for the repository to clone and all npm dependencies to install
- You're in an existing git repository. Do you want to use git for version control? -> Select
no - Do you want to deploy your application? -> Select
no
After that, a folder named after your project should appear. It contains a regular frontend application that additionally has:
- A backendSrc folder with the backend sources
- drizzle.config.ts - the Drizzle ORM config for migrations
- wrangler.json and worker-configuration.d.ts - the worker config and TS types
You can examine the project structure in more detail here.
3. Set up the database
To run the application we need a database. By default the template uses D1 — essentially SQLite in the cloud. Create it with:
npx wrangler d1 create habr-app-d1 # habr-app-d1 - database name
Wrangler will ask you to grant access to the resources and will open a browser. Once the database has been created successfully, the terminal shows:
Successfully created DB 'habr-app-d1' in region EEUR
Created your new D1 database.

{
  "d1_databases": [
    {
      "binding": "DB",
      "database_name": "habr-app-d1",
      "database_id": "aaaaaa-aaaa-aaaaa-aaaa-aaaaaa"
    }
  ]
}
Take the database_name and database_id from here for the next step.
3. Configure the worker
Now open the wrangler.json file — you'll see this:
Next to wrangler.json there is a wrangler.docs.json file. It contains descriptions of the most important worker settings. A more detailed description is available in the official documentation. For our setup, these steps are enough:
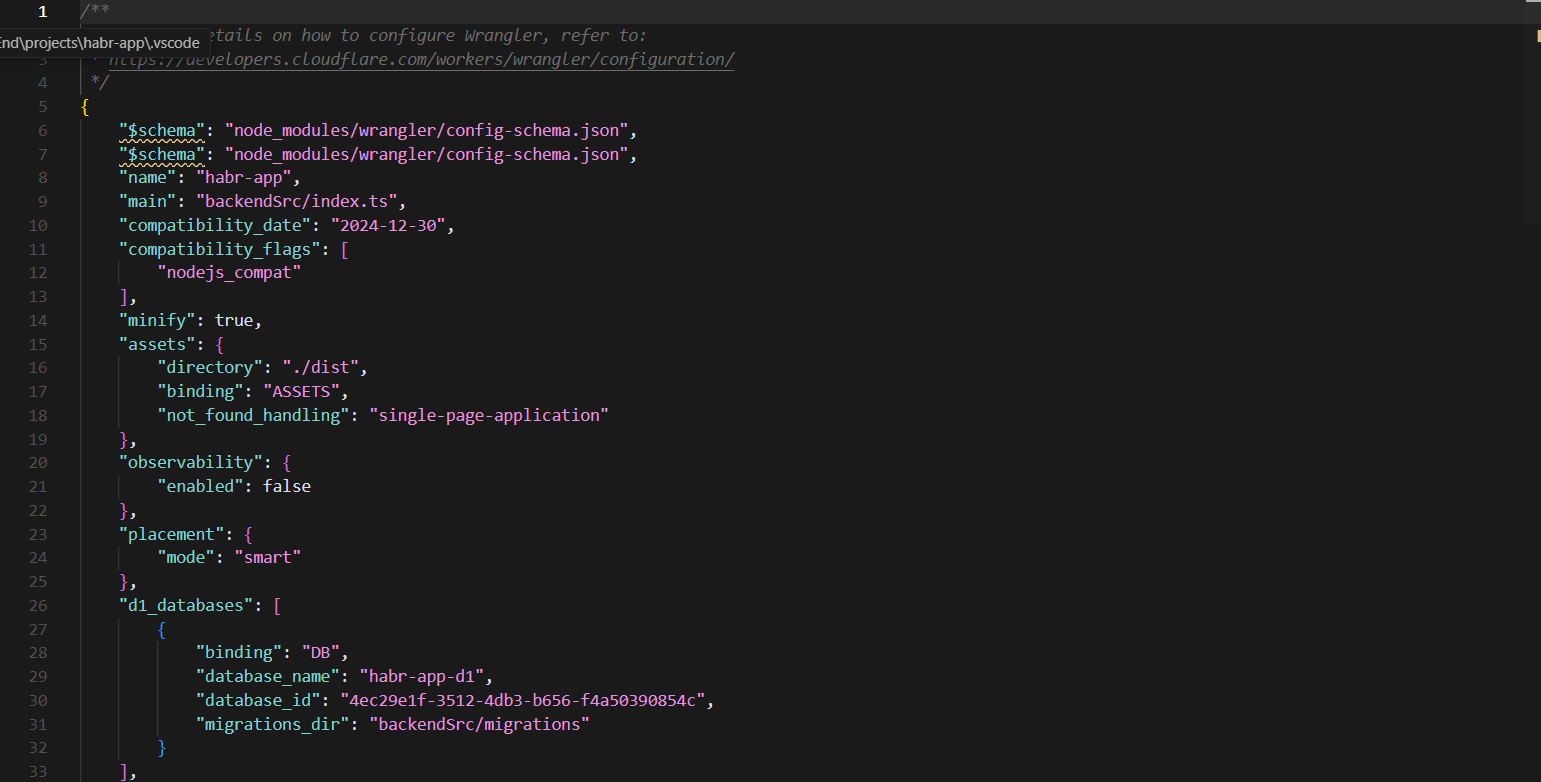
- Remove the duplicate
$schemaheader. - In the
d1_databasesobject, enter thedatabase_nameanddatabase_idfrom the previous step. - Do the same for
env.dev.d1_databasesandenv.test.d1_databases. Later you can point different environments (dev/test/prod) at different databases. - Remove all
r2_bucketsobjects. You can attach buckets for files, but they aren't required to run. - Change the
namefield to your project name.
And the config is ready!
4. Finish up and run
The last things left to do:
- Create a folder for static files.
- Generate TypeScript types for the resources in wrangler.json
- Apply the migrations locally (the migration is already prepared)
- Run it and check everything
We handle all of these tasks with this sequence of commands:
# Build the frontend static files into dist
npm run build

# Generate resource types.
# The new types can now be found in worker-configuration.d.ts
npm run cf-typegen

# Apply migrations
# habr-app-d1 - database_name from wrangler.json
npm run migrate --db=habr-app-d1

# Run the project locally
npm run dev
After that you'll see this in the terminal:
....
Your worker has access to the following bindings:
- D1 Databases:
  - DB: habr-app-d1 (aaaaa-aaaaa-aaaaa-aaaa-aaaaa) [simulated locally]
[wrangler:inf] Ready on http://127.0.0.1:8787
...
The first three lines say that our database was picked up, and the fourth that the project started successfully. Now open the browser.
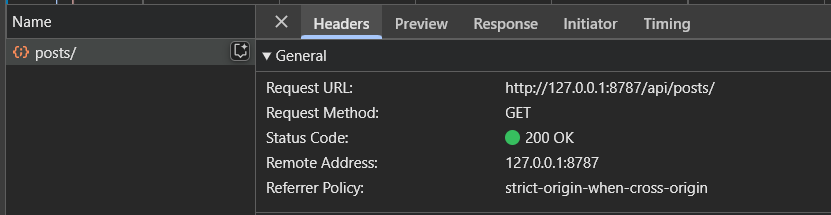
We can see the worker serving the static files. Now let's check the backend: click the Get posts button and look in DevTools:
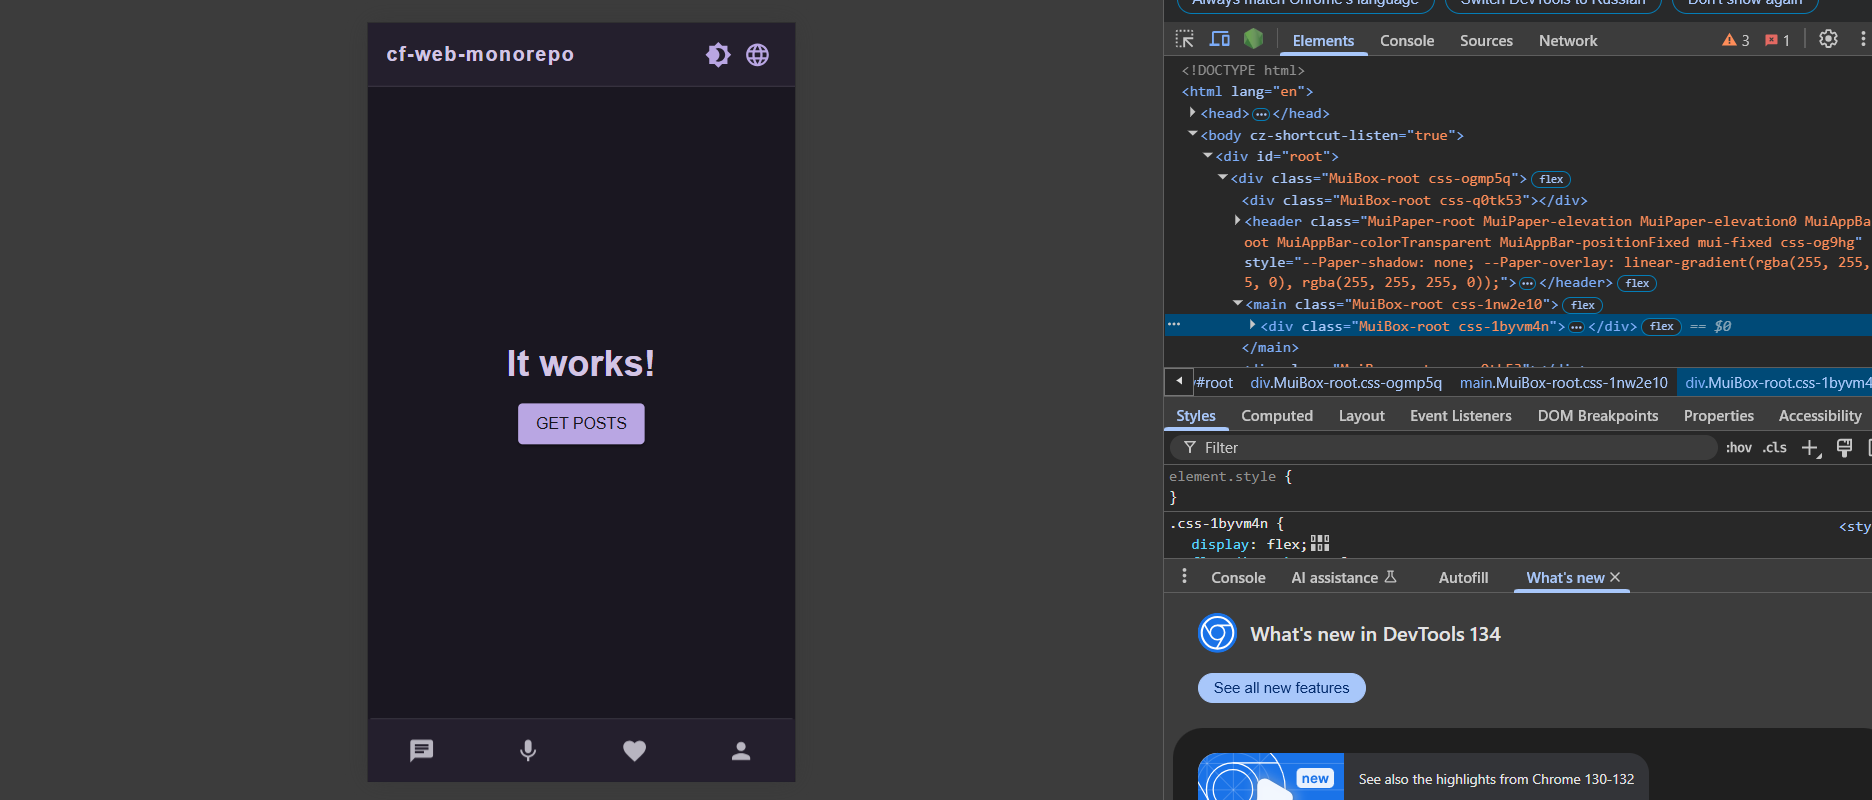
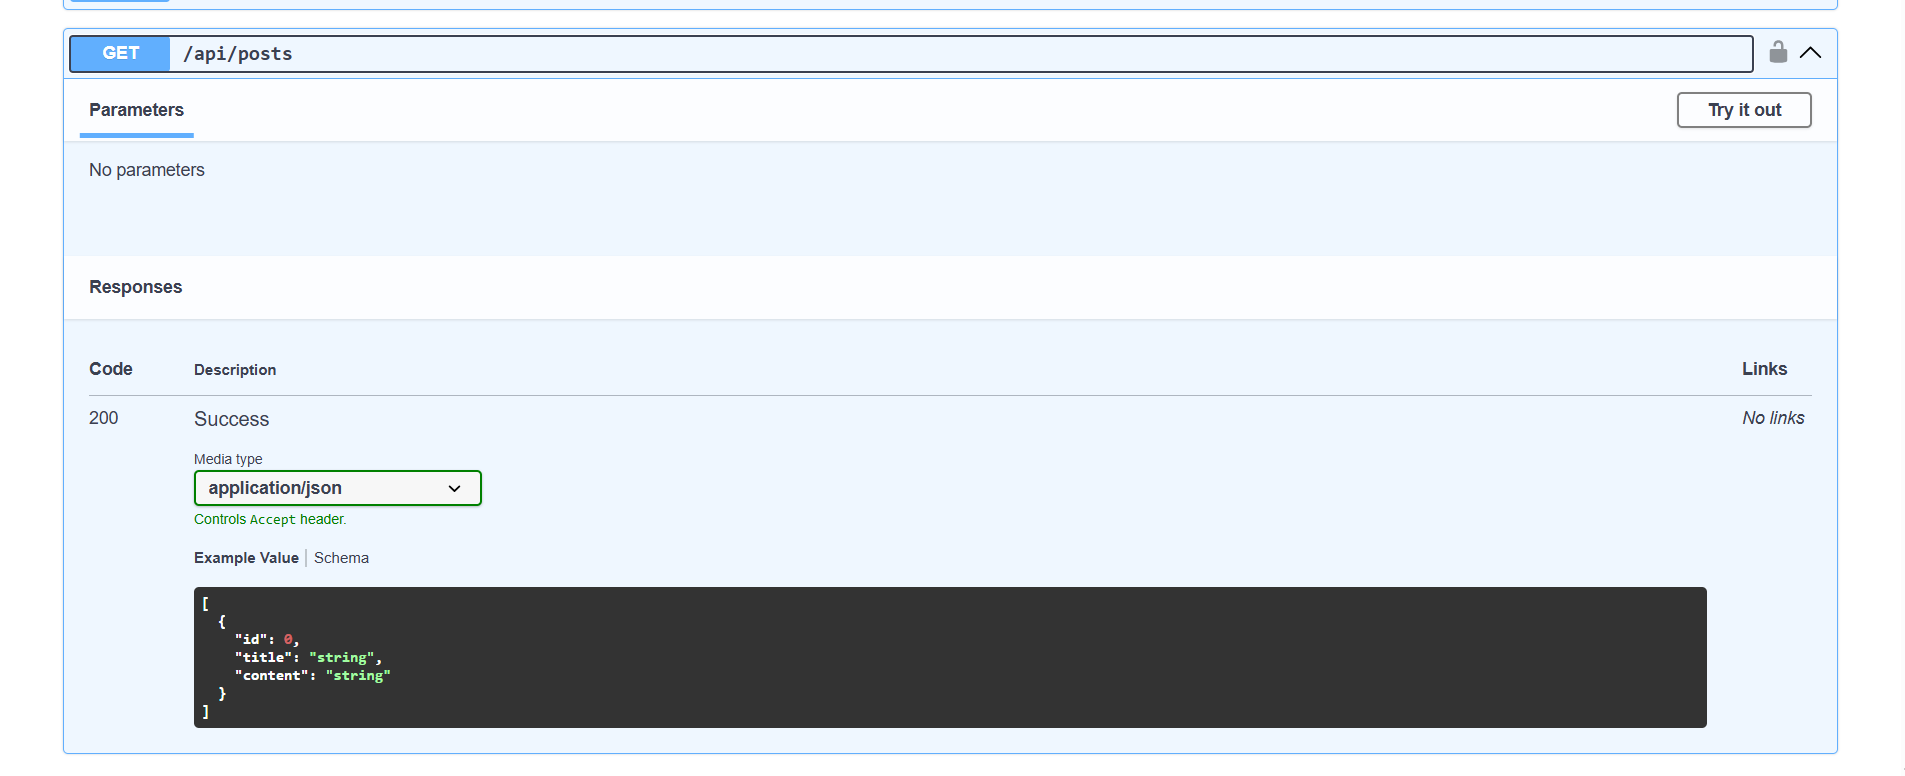
The backend successfully hit the database and returned our posts, which don't exist yet :(. The API schema should have been generated automatically. We can check it at /api/docs:
Great! One clarification: D1 starts locally together with the backend when the project runs, so nothing extra has to be started for development. Convenient? Very!
So we've got the application running locally with a frontend, a backend, and a database. Now, how do we deploy all of this to the cloud?
5. Deploy to the cloud
Deploying the application to the cloud takes just two steps:
1. Run the deploy command:
npm run deploy
Then wait for the project to upload to the cloud. After a successful deploy, the terminal should show roughly this text, which immediately includes the subdomain the application was deployed to:
✨ Success! Uploaded 4 files (3.70 sec)
...
Deployed habr-app-dev triggers (2.74 sec)
  https://habr-app-dev.whiletruedoend.workers.dev
...
The worker can now also be found in the dashboard -> Workers & Pages
2. Apply the migrations:
Migrations are applied to the cloud D1 with the command:
npm run migrate:prod --db=your-database-name-from-wrangler
That's it!
On the first deploy you'll need to wait 10-15 minutes for the domain to propagate across the nameservers. After that you can visit the site at yourappname.youraccountname.workers.dev and see exactly the result promised at the start of this article.
Conclusion
In under an hour you can deploy a full application that you can then adapt to your own projects and needs. Setting up CI/CD pipelines, logging, and monitoring later is just as easy. Connecting a custom domain won't cause any problems either.
So if you're looking for a way to quickly build an MVP or test a hypothesis, Cloudflare Workers is a good option. Start with a small project, experiment a bit, and this tool may become part of your stack.